Why Getting Your Documents Right Matters for NEET 2026
Imagine this: You’ve prepared hard for months. You know your science, you’ve solved practice papers, and you’re ready for NEET 2026. But then, when you start filling your application form online, you realize you’re missing the right documents or they’re in the wrong format. Frustrating, right?
This happens to many students every year. The good news? It doesn’t have to happen to you!
When you apply for NEET 2026, the National Testing Agency (NTA) doesn’t just ask for any documents—they want specific papers in specific formats and sizes. Think of it like a recipe for making your favorite dish. Miss even one ingredient or use the wrong amount, and the whole dish flops!
This blog will walk you through every single document you’ll need for NEET 2026 form filling. We’ll explain what each document is for, how to prepare it, and the exact rules you need to follow. By the end, you’ll feel confident and ready to fill your form without any stress.

Why Does NEET 2026 Ask for These Documents?
Before diving into the long list of documents, let’s understand the “why” first.
NEET 2026 is the entrance exam for medical colleges across India. Thousands of students apply every year. The NTA needs documents to:
- Verify who you are (that you’re really the person filling the form)
- Check your age (you must be at least 17 years old)
- Confirm your education (you’ve passed 10th and 12th grade with the right subjects)
- Understand your background (if you belong to a reserved category or have any special needs)
These documents protect both you and the system. They make sure the exam is fair for everyone.
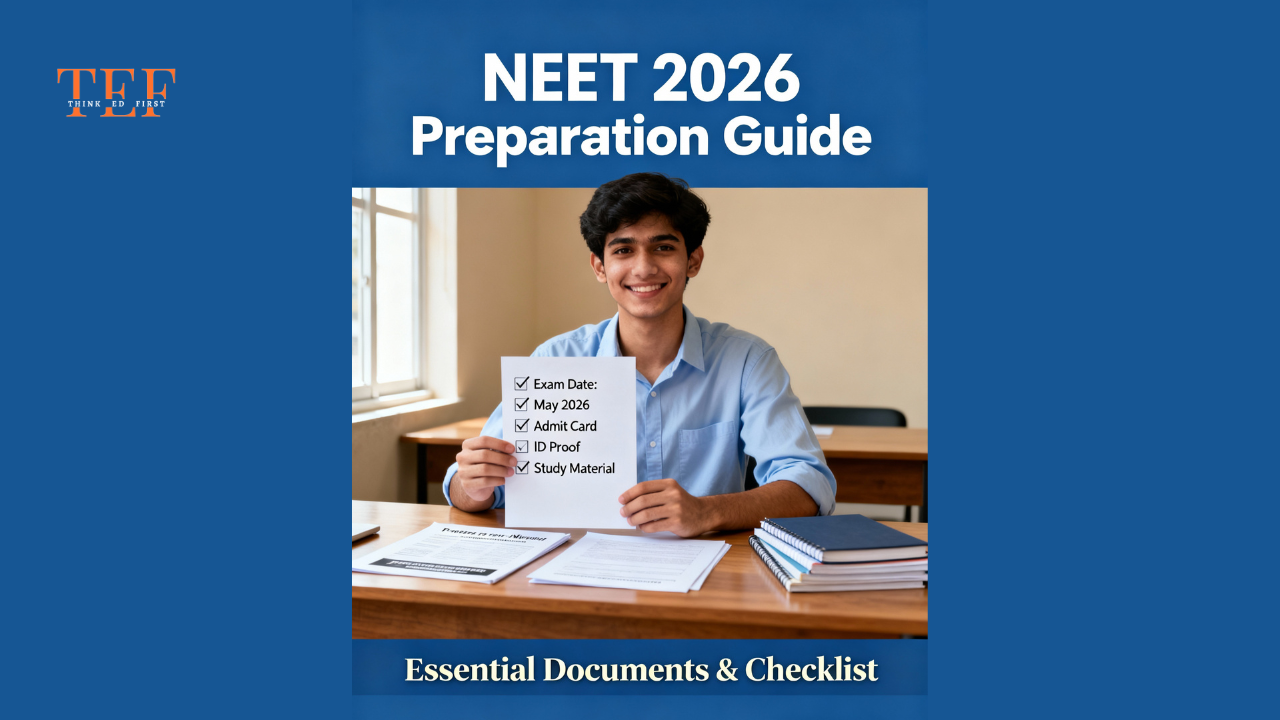
When to Start Collecting Documents for NEET 2026
Here’s an important timeline to keep in mind:
- Registration Opens: February 2026
- Last Date to Submit: March 2026
- Exam Date: First week of May 2026
Pro Tip: Don’t wait until February! Start collecting your documents now, in November or December 2025. Scanning takes time, and mistakes happen. Getting a replacement document from your school can take weeks. Be smart—start early!
Complete List of Documents Required for NEET 2026
Now, let’s get into the main show—the actual documents you’ll need. We’ve divided them into categories to make it super easy for you.
Category 1: Personal Identity Documents Everyone Needs These
These are documents that prove you are who you claim to be.
1. Passport-Sized Photograph
- Size: 2 inches × 2 inches (or as per NTA guidelines)
- File Format: JPG or JPEG
- File Size: 10 KB to 200 KB
- Important Rules:
- Your face should cover about 80% of the photo
- Plain white background only
- Recent photo (taken in the last 6 months)
- No masks, caps, or goggles
- If you wear glasses daily, you can wear them in the photo
- Both ears should be clearly visible
- No filters or heavy editing
Why This Matters: This photo will be printed on your admit card, so make it a good one!
2. Postcard-Sized Photograph
- Size: 4 inches × 6 inches
- File Format: JPG or JPEG
- File Size: 10 KB to 200 KB
- Important Rules: Same as above—white background, recent, no filters
Real-Life Example: Meet Aditya, a 12th-grade student from Mumbai. He took his first passport photo at home using his phone, but the file was too big (500 KB). He had to take it again at a photo studio to get the right size. Lesson learned: Go to a trusted photo studio. It costs just ₹50-100, but saves you a lot of trouble!
3. Your Signature
- Size: 2.5 inches × 3.5 inches
- File Format: JPG or JPEG
- File Size: 10 KB to 50 KB
- Important Rules:
- Black ink on white paper
- Your normal, everyday signature (not fancy or different from usual)
- Clear and legible
- No extra marks or doodles
Practical Tip: Sign your name on a blank white sheet, then scan or photograph it carefully. Many students use the same signature they use in school—that’s perfect!
4. Left-Hand Thumb and Finger Impressions
- Size: 2.5 inches × 3.5 inches
- File Format: JPG or JPEG
- File Size: 10 KB to 200 KB
- Important Rules:
- Both left thumb and left-hand fingers should be clear
- Use black ink (stamp pad or ink pad)
- Press gently but firmly on white paper
- Make sure impressions are dark and clear
Real-Life Example: Priya, a student from Bangalore, didn’t press her thumb impression clearly the first time. It was too light. She had to redo it three times to get it right. Pro tip: Use a proper ink pad, not just a pen. It makes a huge difference!

Category 2: Educational Documents (Everyone Needs These)
These documents prove that you’ve completed your schooling with the right subjects.
5. Class 10 Pass Certificate
- What It Shows: You’ve passed 10th grade
- File Format: PDF or image (JPG/JPEG)
- File Size: 50 KB to 300 KB
- Why It Matters: NTA uses this to verify your Date of Birth (DOB)
6. Class 10 Marksheet
- What It Shows: Your marks in all subjects in 10th grade
- File Format: PDF or image
- File Size: 50 KB to 300 KB
- Important Note: If your 10th marksheet doesn’t show clear marks, you might need an equivalency certificate
7. Class 12 Pass Certificate
- What It Shows: You’ve passed 12th grade
- File Format: PDF or image
- File Size: 50 KB to 300 KB
8. Class 12 Marksheet
- What It Shows: Your marks in 12th grade
- File Format: PDF or image
- File Size: 50 KB to 300 KB
- Must Include: Physics, Chemistry, and Biology marks
Category 3: Identity Proof (Everyone Needs One of These)
Choose any ONE of the following based on what you have:
Valid Identity Proof Options:
- Aadhaar Card (most common)
- Passport
- Voter ID
- PAN Card
- Driving License
File Format: JPG/JPEG or PDF
File Size: 10 KB to 200 KB
Which One Should You Choose?
If you’re an Indian student, Aadhaar is the easiest option because NTA links directly with Aadhaar. No additional scanning needed—they’ll pull your details automatically!
Real-Life Example: Rajesh from Delhi uploaded his Voter ID instead of Aadhaar. The process worked, but took extra time for verification. Lesson: Aadhaar is the fastest option. Use it if you have it!
Category 4: Address Proof (Everyone Needs This)
You’ll need to show proof of where you live. Upload two documents:
1. Present Address Proof (where you’re living right now)
2. Permanent Address Proof (your permanent home address)
Acceptable Documents:
- Electricity bill
- Water bill
- Gas bill
- Ration card
- Bank statement
- Passport (first and last page)
- Voter ID
- Driving license
File Format: PDF or JPG/JPEG
File Size: 50 KB to 300 KB
Important: The document must show your name and address clearly
Practical Tip: If your present address is the same as your permanent address, you can upload the same document twice. That’s totally fine!

Category 5: Special Documents (Only If Applicable to You)
Not everyone needs these, but if you do, they’re super important!
9. Category Certificate (If You Belong to a Reserved Category)
If you’re applying under SC, ST, OBC, or EWS category:
- What It Is: Official certificate from your state government
- File Format: PDF
- File Size: 50 KB to 300 KB
- Where to Get It: District Collector’s office or your Block Development Office (BDO)
- Processing Time: Can take 2-4 weeks, so apply early!
Important Rule: The certificate must be issued on or after a specific date mentioned in the official brochure. An old certificate might not work!
10. PwBD Certificate (If You Have Any Disability)
If you’ve been identified as a Person with Benchmark Disability:
- What It Is: Certificate showing your disability and its percentage
- Acceptable Options:
- PwBD certificate from a government medical board
- UDID card (Unique Disability Identity)
- Swavlamban card
- File Format: PDF
- File Size: 50 KB to 300 KB
Real-Life Example: Sanjana from Hyderabad applied for disability benefits. She had her UDID card uploaded, which made the process smooth and quick. The NTA recognized it immediately, and she got her admit card without any delays.
Category 6: For Non-Indian Students Only
If you’re not an Indian citizen, you’ll need:
11. Citizenship Certificate or Proof of Nationality
Acceptable Documents:
- Passport (both first and last pages, clearly showing citizenship)
- Citizenship certificate from your country’s government
- OCI (Overseas Citizen of India) card
- Embassy certificate
- PIO (Person of Indian Origin) card
File Format: PDF
File Size: 50 KB to 300 KB
Important: Document must clearly show your citizenship and validity period
Quick Comparison Table: Documents at a Glance
Here’s a super helpful table to see all documents in one place:
| Document Type | Required For | File Format | File Size | Special Notes |
|---|---|---|---|---|
| Passport Photo | All students | JPG/JPEG | 10-200 KB | White background, recent |
| Postcard Photo | All students | JPG/JPEG | 10-200 KB | 4×6 inches, same rules as passport |
| Signature | All students | JPG/JPEG | 10-50 KB | Everyday signature, black ink |
| Thumb Impression | All students | JPG/JPEG | 10-200 KB | Left hand, clear ink impression |
| Class 10 Certificate | All students | PDF/Image | 50-300 KB | For DOB verification |
| Class 10 Marksheet | All students | PDF/Image | 50-300 KB | Clear marks required |
| Class 12 Certificate | All students | PDF/Image | 50-300 KB | Proof of completion |
| Class 12 Marksheet | All students | PDF/Image | 50-300 KB | Must include PCB marks |
| Identity Proof | All students | JPG/JPEG/PDF | 10-200 KB | Aadhaar recommended |
| Address Proof (2) | All students | PDF/Image | 50-300 KB | Present & permanent address |
| Category Certificate | Reserved category only | 50-300 KB | If applicable | |
| PwBD Certificate | Disabled students only | 50-300 KB | If applicable | |
| Citizenship Proof | NRI/OCI/Foreign only | 50-300 KB | Passport or citizenship cert |
Step-by-Step Guide: How to Prepare Your Documents
Now that you know what documents you need, let’s talk about how to prepare them properly. This is where many students go wrong!
Step 1: Gather All Original Documents
Before you scan anything, collect all the originals:
- Original Class 10 and 12 certificates and marksheets
- Your ID proof
- Any category certificates you need
- Bills for address proof
Timeline: Do this in November or December 2025, not in February!
Step 2: Get Professional Scans
Here’s the golden rule: Don’t scan at home if you can help it!
Why? Because:
- Home scans often come out unclear
- File sizes are usually wrong
- Poor quality scans get rejected
What to Do Instead:
- Go to a professional scanning center (charges: ₹5-10 per page)
- Ask them to follow NTA guidelines for file size and quality
- Keep a backup on a USB drive
Pro Tip: When you’re at the scanning center, get 2 copies of each document. One to upload, one as backup. It costs just a few extra rupees!
Step 3: Take Fresh Photographs
For your passport and postcard photos:
Best Option: Visit a professional photo studio
- They know the exact NTA size requirements
- Cost: ₹50-100 for both photos
- They’ll give you digital files in the right format
Alternative (If Money is Tight):
- Ask a friend to photograph you properly
- White background (use a white sheet)
- Make sure your face is clearly visible
- Take multiple shots and pick the best one
- Edit on your phone to get the right file size (use free apps like Pixlr)
Step 4: Create Your Digital Signature
You don’t need to buy anything special for this:
- Write your signature on a blank white sheet with a black pen
- Take a clear photo or scan it
- Make sure the file size is between 10-50 KB
- If it’s too big, use any online image compressor (search “free image compressor”)
Step 5: Get Your Biometrics (Thumb Impressions)
You’ll Need:
- A clean ink pad (or wet your thumb on a stamp pad)
- White paper
- Black pen (as backup)
How to Do It:
- Gently roll your left thumb on the ink pad
- Press firmly (but not too hard) on white paper
- Press your left-hand fingers (index, middle, ring, little) on the paper
- Let it dry completely
- Scan or photograph carefully
- Make sure impressions are dark and clear
Step 6: Check File Sizes and Formats
Before uploading anything, verify:
- ✅ File is in the right format (JPG, PDF, etc.)
- ✅ File size is within the limit
- ✅ Image is clear and readable
- ✅ File name is correct (if NTA specifies naming rules)
Easy Way to Check File Size:
- Right-click on the file
- Select “Properties” (Windows) or “Get Info” (Mac)
- See the “Size” field
Too Big? Use an online compressor tool
Step 7: Organize Everything
Create a folder on your computer called “NEET 2026 Documents” and organize it like this:
textNEET 2026 Documents/
├─ Photographs/
│  ├─ Passport_Photo.jpg
│  └─ Postcard_Photo.jpg
├─ Certificates/
│  ├─ Class10_Certificate.pdf
│  ├─ Class10_Marksheet.pdf
│  ├─ Class12_Certificate.pdf
│  └─ Class12_Marksheet.pdf
├─ ID Proof/
│  └─ Aadhaar.pdf
├─ Address Proof/
│  ├─ Electricity_Bill.pdf
│  └─ Permanent_Address.pdf
└─ Signature_Thumbprint/
   ├─ Signature.jpg
   └─ Thumbprint.jpg
This way, when you start filling the form, everything is ready in one place!

Common Mistakes Students Make (And How to Avoid Them)
Learning from others’ mistakes is smart! Here are the top 10 mistakes:
Mistake #1: Using an Old Photograph
- ❌ Wrong: Using a photo from 2 years ago
- ✅ Right: Take a fresh photo within the last 6 months
Mistake #2: Wrong Photo Background
- ❌ Wrong: Colorful background, nature background
- ✅ Right: Plain white background only
Mistake #3: File Size Too Big
- ❌ Wrong: Uploading a 500 KB photo (limit is 200 KB)
- ✅ Right: Compress the file using online tools before uploading
Mistake #4: Unclear Scans
- ❌ Wrong: Scanning documents in dark lighting or at an angle
- ✅ Right: Scan in bright light, straight on, at a professional center
Mistake #5: Missing or Wrong File Format
- ❌ Wrong: Uploading a PNG when JPG is required
- ✅ Right: Check the format requirement and convert if needed
Mistake #6: Forgetting Address Proof
- ❌ Wrong: Only uploading one address proof
- ✅ Right: Upload both present and permanent address proofs
Mistake #7: Outdated Category Certificate
- ❌ Wrong: Using a category certificate from 5 years ago
- ✅ Right: Get a fresh certificate before applying
Mistake #8: Wrong Signature
- ❌ Wrong: Signing in a different style than your usual signature
- ✅ Right: Use your everyday, normal signature
Mistake #9: Dirty or Unclear Thumb Impressions
- ❌ Wrong: Faint impressions that aren’t visible
- ✅ Right: Use proper ink pad and press firmly
Mistake #10: Waiting Until Last Minute
- ❌ Wrong: Starting to collect documents in March 2026
- ✅ Right: Collect and scan everything by December 2025
Your Action Plan: Get Ready for NEET 2026 Documents
Don’t let document stress slow you down! Here’s a simple action plan:
RIGHT NOW (November-December 2025):
- Collect all original documents from home
- Visit your school to get certified copies of 10th and 12th certificates/marksheets
- Apply for category certificate if needed (this takes time!)
- Get professional passport and postcard photos taken
NEXT (January 2025):
- Get all documents professionally scanned
- Create your signature file
- Take thumb impressions
- Create the organized folder on your computer
- Double-check all file sizes and formats
WHEN REGISTRATION OPENS (February 2026):
- Have all documents ready to upload
- Fill your form carefully
- Upload documents exactly as instructed
- Keep a screenshot of your submitted form
Quick Checklist: Before You Click “Submit” on Your NEET 2026 Form
Use this checklist right before you submit your application:
Personal Information:
- ✅ Name spelled correctly?
- ✅ Date of birth correct?
- ✅ Contact number and email entered?
Photographs:
- ✅ Passport photo uploaded (clear, white background)?
- ✅ Postcard photo uploaded (correct size)?
- ✅ Both files between 10-200 KB?
Signature & Biometrics:
- ✅ Signature file uploaded (10-50 KB)?
- ✅ Thumb impressions uploaded (clear, left hand)?
- ✅ Both between 10-200 KB?
Education Documents:
- ✅ Class 10 certificate uploaded?
- ✅ Class 10 marksheet uploaded?
- ✅ Class 12 certificate uploaded?
- ✅ Class 12 marksheet uploaded?
Identity & Address:
- ✅ ID proof uploaded?
- ✅ Present address proof uploaded?
- ✅ Permanent address proof uploaded?
Special Documents (If Applicable):
- ✅ Category certificate uploaded (if reserved category)?
- ✅ PwBD certificate uploaded (if applicable)?
- ✅ Citizenship proof uploaded (if NRI/OCI/foreign)?
File Quality:
- ✅ All files are clear and readable?
- ✅ All files in correct format (JPG/PDF)?
- ✅ All files within size limits?
Final Thoughts: You’ve Got This!
Getting your NEET 2026 documents ready might seem like a lot of work, but it’s actually pretty straightforward once you break it down. The key is starting early and following the rules carefully.
Remember:
- Start collecting documents now in November-December 2025
- Use professional services for scanning and photography (it’s worth the small cost)
- Follow NTA guidelines exactly (they’re strict for a reason!)
- Keep backup copies of everything
- Organize your files so you don’t lose them
Thousands of students fill their NEET 2026 forms successfully every year. With this guide and a little bit of planning, you’ll be one of them!
The real goal here isn’t just getting your documents right—it’s removing one big source of stress from your life so you can focus on what really matters: preparing well for the exam itself.
Take Your Next Step with Think ED First
Feeling confident about your documents? Great! But NEET preparation is just the beginning of your medical school journey.
Whether you’re applying to medical colleges in India or dreaming of studying medicine abroad, the decisions ahead can feel big. That’s where Think ED First comes in.
If you or your child is planning for admissions in India or to study abroad, Think ED First is here to guide you every step of the way. Reach out to us to make your academic journey smoother and smarter!
We help students like you navigate:
- ✨ NEET preparation strategies
- ✨ Medical college admissions across India
- ✨ Study-abroad opportunities for medical education
- ✨ Scholarship and financial aid guidance
- ✨ Career planning after medical college
Don’t go through this journey alone. Our team of education consultants understands the Indian education system inside and out. We’ve helped hundreds of students achieve their dreams.
Ready to make smart choices about your future? Connect with Think ED First today and let’s build your path to success together!
FAQ: Quick Answers to Your Questions About NEET 2026 Documents
Q: Can I use an old photograph from last year?
A: No! Your photo must be recent (within the last 6 months) with a plain white background.
Q: What if my address changes between now and February 2026?
A: Upload your current address. If it changes later, you can update it when form corrections happen (usually in March).
Q: Do I need both Class 10 and Class 12 certificates?
A: Yes! Class 10 proves your date of birth, and Class 12 proves you completed the required subjects.
Q: Which ID proof should I use?
A: Aadhaar is best because NTA connects directly to it. But Passport, Voter ID, or PAN also work.
Q: Can I get a category certificate after I apply?
A: No! Get it before you apply. Processing takes 2-4 weeks, so apply immediately if you need one.
Q: What if my file size is wrong?
A: Your application might be rejected. Always check and compress files before uploading.
Q: Do I need to bring originals to the exam center?
A: Yes! Bring ID proof, admit card, photograph, and any category/disability certificates to the exam.

Last Updated: November 2025
Disclaimer: This guide is based on NEET 2026 guidelines. Always check the official NTA website (neet.nta.nic.in) for the most current information and any updates.